Apart from flirting with a photo challenge recently, my blog has been under radio silence for quite a while – more than 3 months in fact. I found myself totally overwhelmed by a ‘part-time’ consulting job that I’d had for more than 5 years, and decided that it simply had to go!
I resigned back on December 2, giving 3 months notice, only to be asked to add a month to that. I politely declined, and set about making it possible to pass the multitude of projects, tasks, files and details on to someone who had the wherewithal to do the job well, while staying in touch with the realities of their own lives, all at the same time. I obviously hadn’t managed that myself, but firmly believe that its possible for someone else, somehow. I’m happy to say that now, months later, my replacement is firmly in place, with all the necessary skills to fulfill the role, with all the above-mentioned transferred to her new laptop. I wish her the very best, and in other circumstances, I’d be happy to have called her a new friend.
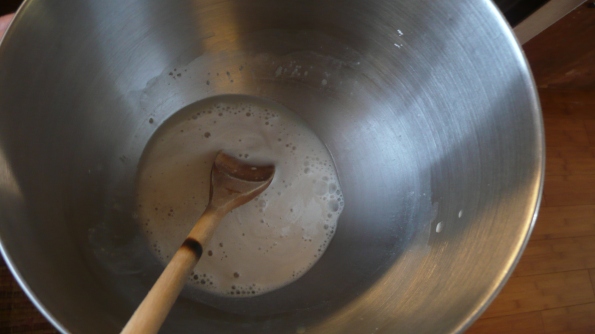
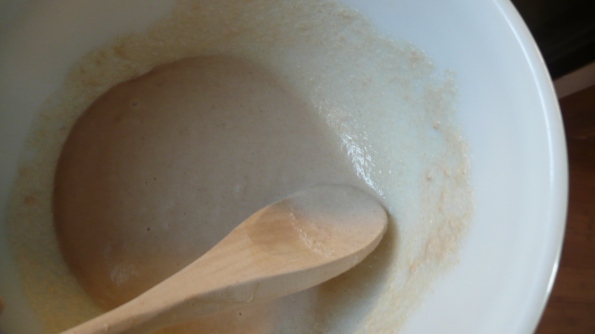
Ready to add the butter, salt and then flour once the yeast has foamed.
So upon my departure I decided to take 2 weeks ‘staycation’ to catch up the life that I call my own, that I’d been so sadly missing. I’ve mastered my own filing, moved seldom worn clothes from my closet to the thrift store, taken beach walks with our dog , met up with long-neglected friends, bought gourmet cookbooks, a mandoline (thats a kitchen implement, rather than musical instrument), and even baked bread!
I’ve simply been having fun, and intend to do more of that for the next week too.
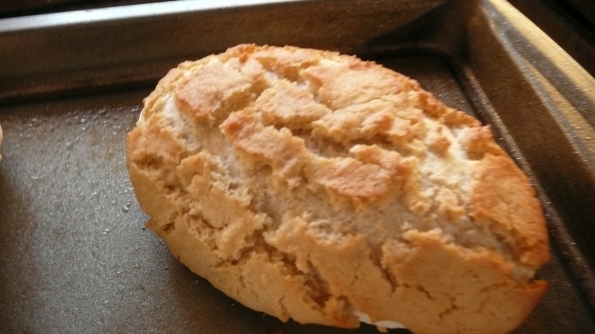
So, here is the product of my bread baking adventure: Tigerbrood – known around these parts as Dutch Crunch Bread! My ‘hubberson’ is a huge fan of these rolls, and I decided that instead of buying them I could make some for him to enjoy. As soon as I looked at recipes I realized that I didn’t have any rice flour so I set about making my own from the organic brown rice I always have on hand. It took a long time, and a lot of patience to make it in the blender.
I only have a small Cuisinart blender and it’s not intended to be used for anything so intense, so I pulsed away off and on for about 30 minutes to get the flour to a consistency that I thought my be just suitable. It actually made a great crunchy topping, though perhaps a little thicker than necessary. The recipe I was using had 2 packages of yeast in the topping, but I think that 1 would be plenty.
I was happy to find this recipe which creates a very soft and moist finished bread, perfectly complementing the crunch of the topping.
Dutch Crunch Bread
3/4 cup warm water
1 tspn sugar
2 1/4 tspns active dry yeast (1 envelope)
1/2 tspn salt
1 Tblspn melted butter
2 cups all-purpose flour + 1/4 cup whole wheat flour mixed
Crunchy Topping
2 tspsn sugar
2 1/4 tspns active dry yeast (1 envelope)
1/4 tspn salt
6 Tblspns rice flour (I made my own from brown rice)
1 tspn vegetable oil
1/3 cup warm water
Bread instructions:
Combine warm water, yeast and sugar in a bowl, stir gently and place in a warm place to ‘activate’ yeast. Leave about 10 minutes, while preparing salt and melted butter. When yeast mixture has bubbles, or foam has formed on the top, add the melted butter and salt and stir well. Add 1 1/2 cups of flour and mix gently.
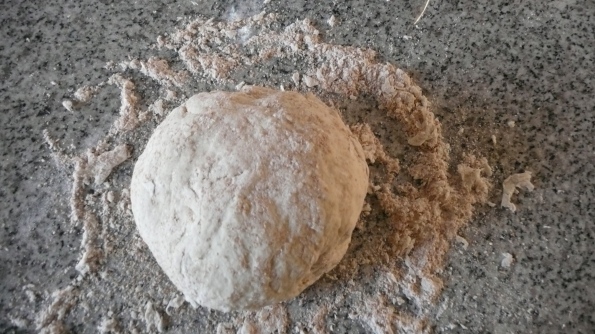
Knead with a bread hook for about 8 minutes, slowly adding remaining flour a little at a time. Note: you may not need all the extra flour – only add flour until it stops being incorporated into the dough. This step can also be done by kneading by hand on a floured board, though it takes a little longer.
Once no more flour is being absorbed, place the dough in the bowl cover it and stand it in a warm place until it doubles in size. About 45 minutes should do it. While this is happening make your topping and leave it to rise also.
Topping:
Gently mix all ingredients and allow to stand in a warm place until doubled. Approx 30 – 35 minutes.
When the dough has doubled, punch it down on your floured board and knead a little to remove excess air. Form into rolls (or a loaf), and place in or on a greased pan. Spread crunch topping over and leave to rise, uncovered, for about 30 minutes or until they’re puffed up again.
Preheat oven to 375 deg F. Bake rolls for approximately 20 minutes depending on their size, or loaf for about 50 – 55 minutes, or until rich golden brown. Enjoy!
Original recipe sourced from www.bigoven.com.
So far I haven’t revealed much about myself here. I’m a very private (and shy) person, but it seems only fair that I share a little, especially when I I have the good fortune to be in this amazing place, enjoying these wonderful views.
You see here a couple of views from the lodge deck of Esalen Institute in Big Sur, California. It’s a very beautiful place, with lots more to offer than just this amazing view.
I’m here assisting a workshop for the weekend, and getting to enjoy the views, the great food, and the company of like-minded others. I couldn’t ask for much more – except of course my husband being by my side.
I hope your weekend is as blessed as mine.
 is in the eating. Yorkshire Pudding that is…
Its been a cold, wet fall day here which left me wanting hot and hearty food, not to mention that its a great way to warm up the house. We happened to have a beef roast ready to go, so that, along with roast potatoes, carrots, and parsnip, steamed brussels sprouts, broccoli and asparagus and a Sunday roast is created.
I’ve been wanting to try making these for a few years, and I’ve felt too intimidated. I have powerful memories of my mother making them, and I was always surprised at how that thin liquid could become huge puddings in no time. We’re having roast beef, so what better time to finally attempt them.
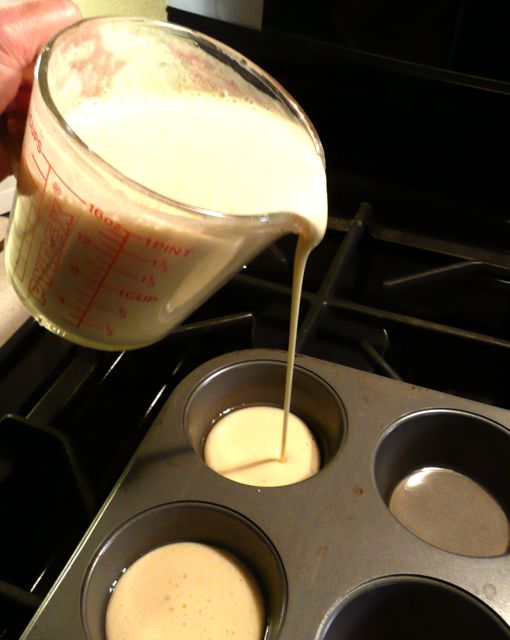
The mixture is best made in a large pitcher making it easy to be poured into the muffin tray. I was tempted to overfill each cup, but after reading lots of hints online, I managed to resist that temptation, and trust that they’d rise just as I hoped.
 Here they are starting to rise at 10 minutes
I found myself cross-legged in front of the oven just watching them rise. It was like watching a psychological thriller, just waiting to find out who dun it! I even remembered to take photos of the progress. I hope you find them as impressive as I did.
 At 20 minutes they seem to threaten to overflow
About this point, I was tempted to open the oven to get a better photo, but somehow managed to resist that too. I wanted a photo at the top of the post that I’d feel proud of, and opening that door would have doomed them, I’m sure.
Yorkshire Pudding
1 cup all-purpose flour
2 eggs
1 cup of milk (or milk and water) +/-
1/2 tspn salt
2 Tbspn of some form of fat – Oil, lard, dripping, butter to grease the muffin tins
Directions:
Heat your oven to 425F.
Beat the eggs well and then add the milk to the bowl. Put the flour and salt into a large pitcher. Give it a quick stir to mix. Add the liquids, and beat well. You’re trying to get a mixture the consistency of thick cream, which may take a little more milk.
Place 1/2 tspn fat into each muffin cup of your tray. Place the tray into the hot oven for 5 – 8 minutes, or until the fat is smoking.
Carefully remove the tray from the oven and pour a little of the mixture into each cup – approximately 1/3 of each muffin cup.
Bake at 425F for about 25 minutes or until golden brown. Serve with roast beef, vegetables and gravy and enjoy.
As usual, no comments from the family, though they were quick to chow down on them. My take is that they were great. Light on the inside and crisp on the top. Excellent with a little homemade gravy too.
Here is my first cooking post, and its about something I’m actually cooking – yes, right now. As I write this there are 2 lbs of pork in my brand spanking slow cooker, bubbling away getting tender and juicy.
After reading a post on Canyoustayfor dinner about a slow cooker version of beef chili, I simply had to acquire the means, without delay. Off I went to the store next day and now it has a place on my kitchen counter, nestled between the blender/food processor and Kitchen Aid stand mixer. It seems at home to me.
Part of my motivation for blogging is to get some response to my culinary fare. My new family appreciate having dinner made for them (frozen pasta or tamales wears thin eventually), though they really wouldn’t mind if it was simply meat and potatoes every night. I need more variety than that and rather than insisting they give me their opinions (like pulling teeth), I thought perhaps the blogosphere might be a better place to fulfill that need.
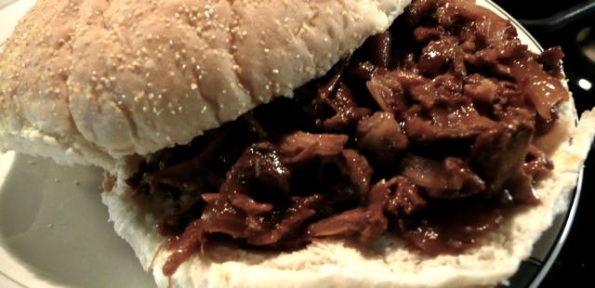
Without further delay, Pulled pork! I must confess, at this juncture, that I’ve only tasted pulled pork once, and I loved it. I’m also Australian with no BBQ skills in my genetic inheritance or even much knowledge. So now you begin to see why I called this blog Clever in the Kitchen. I am fortunate enough to succeed at most dishes I attempt. I know what I like and after about 35 years of playing around in the kitchen I have some idea of what flavors will co-exist, and those that might enliven one another. So I experiment, with about a 95% rate of success. Failures are usually turned into a different dish, and mostly no-one knows the difference. I also spend waaaay too much time on the internet looking at recipe sites, and food blogs, and hopefully getting the benefit of others’ experience.
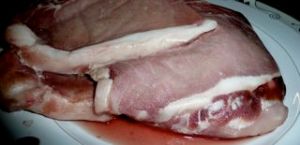
So on to the pork. We have a very generous Portuguese farmer friend who regularly gifts us pork chops. There are many ways to cook pork chops, and I’ve tried quite a few. What many of those ways have in common are that they are usually too dry for my taste. I know, I probably overcook them because of my concern about under-cooked pork.
So instead of trying to find yet another recipe for pork chops, I took a look at this 2 lb bag in our freezer and decided that they have enough fat on them to be re-purposed… into pulled pork. I then Googled slow cooker pulled pork did my research, took a look in my refrigerator and store cupboard and came up with this.
RECIPE
2 lb pork chops (with some fat)
medium onion roughly chopped
3/4 cup favorite BBQ sauce
1/4 cup apple cider vinegar
1 Tbsp teriyaki sauce
2 Tbsp worcestershire sauce
2 tspns chopped/crushed garlic
Mix liquids in a small pitcher. Add onion and garlic to slow cooker then add pork and pour over liquid. Set to high for 5 hours. Remove meat to a board carefully (a big slotted spoon works well, as it will be falling apart) and shred with two forks, removing any fat pieces that remain.
Serve shredded pork on fresh buns with, or without, extra BBQ sauce. Coleslaw is a great addition too. Lick lips often.
Lately I’ve been fascinated by blogs. Mainly cooking and baking blogs – well actually many different types of blogs – but the food ones are the ones to which I keep returning.
A couple of the reasons for my the development of my fascination are that I have recently moved to a new town, on the Central Coast of California, and haven’t yet managed to make new friends here – and did I mention that I recently married my sweetheart.
It feels like a very different life, and extra time on my hands seems to be spent either cooking for my new family (who don’t seem to mind), and visiting Freshly Pressed searching out new ideas for dinner and dessert.
Since cooking for others and eating are two things I consistently attain joy from, it seems only logical that food is mostly what I plan to discuss here. Oh, and hopefully to photograph it too.
I’ll be back with more soon, but meanwhile here’s this to be going on with.

